Installation Java on Ubuntu
Java stands out as one of the most widely used and versatile programming languages, extending beyond a mere language to empower developers in constructing a diverse array of programs. Java’s adaptability makes it a cornerstone in programming, from lightweight mobile apps to robust desktop applications.
On Ubuntu, Java provides a robust foundation for desktop development and ensures seamless compatibility for lightweight mobile experiences. Its integration with Ubuntu facilitates smooth and efficient development, making it an excellent choice for various projects.
Java’s integration with Ubuntu is essential for developers. This dynamic synergy provides access to a large number of libraries and frameworks, so in this way, it increases productivity.
The advantages of utilizing Java with the Ubuntu development environment will be highlighted in this step-by-step tutorial that will demystify the installation procedure on Ubuntu 22.04.
Jump To...
Install Java on Ubuntu by following a step-by-step guide
Prerequisites:
A user account on Ubuntu with sudo access.
Command Line Access (it can be accessed by using the shortcut Ctrl + Alt + T).
The accessibility of the apt (or apt-get) command in Ubuntu.
Java Versions:
Java Platform, Standard Edition (Java SE)
Java Platform, Micro Edition (Java ME)
Java Enterprise Edition (Java EE)
JavaFX.
Java EE:
With Java EE, developers can create secure, scalable, and reliable network applications by using technologies that go beyond Java SE. Assuring dependability in a variety of computing settings, it meets the demands of large, multitiered systems with a customized runtime environment and API. This gives developers the tools they need to design and implement enterprise-level apps efficiently.
Java ME:
Java ME is an extension of Java, allowing Java programs to run on tiny devices such as mobile phones through the use of a small virtual machine and API. This segment of the Java SE API includes specialized class libraries tailored for developing applications for small devices. Notably, Java ME applications frequently act as clients to Java EE platform services, facilitating seamless integration with more extensive, enterprise-level systems.
Java FX:
JavaFX is a platform designed for creating advanced web applications using a user-friendly API. These applications utilize hardware-accelerated graphics and media engines to achieve a contemporary look and feel suitable for high-performance client environments. JavaFX includes high-level APIs that enable efficient communication with networked data sources.
Additionally, JavaFX-developed applications can also serve as clients accessing Java EE platform services.
Distinguishing between Java Development Kit and Java Runtime Environment
JDK
JRE
JDK is used for Java development and programming.
JRE is used to run Java-based applications.
It includes nearly everything you need as a Java developer because it is a comprehensive package for Java programming.
Its primary audience is end users, who merely utilize Java apps as tools or software on their computers rather than creating them.
All the development and debugging tools required for Java development will be provided to you since it is in charge of that area.
Development tools are not available as JRE is not responsible for development.

Checking the Java Version on Ubuntu:
Make sure Ubuntu is installed on your computer before moving forward. On Ubuntu, you may rapidly reach the terminal by using Ctrl + Alt + T.
Step 1: Open the Ubuntu terminal.

Step 2: Run the command java – -version
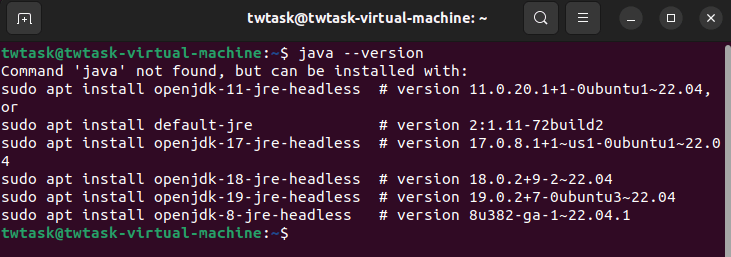
Output command java
It is confirmed that Java is not installed on your computer if the response indicates “Java not found,” as in the preceding screenshot.
But if it shows any version of Java or JDK, it means that the default Java version is already installed on your computer. You can remove outdated installed versions and install newer ones, depending on the last java installed version and your needs for other versions. Alternatively, you can keep both copies and make one the default.
Install Java using Apt on Ubuntu 22.04 with the following steps
Setting Up the Default JRE/JDK:
OpenJDK 11 is installed by default on Ubuntu. To install Java packages on Ubuntu with ease, follow these steps:
Updating the Ubuntu:
Before installing Java, make sure that the operating system on your Ubuntu is updated. Use the sudo apt update command for an Ubuntu upgrade. When asked, enter your password.
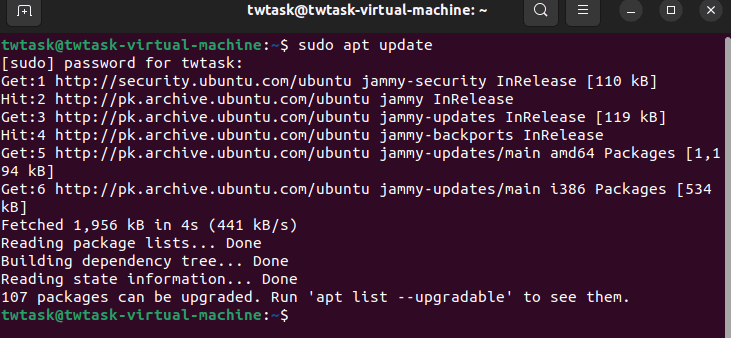
Verify that everything has been updated after the upgrade.

Install OpenJDK:
To install the most recent version of the Java Development Kit, use the command sudo apt install default-jdk after updating.
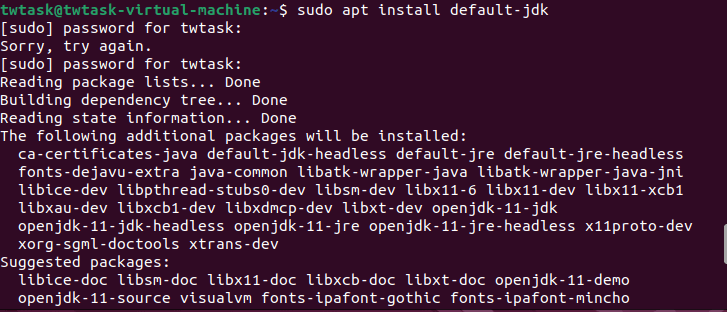
A wrong password entry caused the procedure to fail, as seen in the image. Only when I entered the right password, it proceeded.

Type y and press enter to confirm the installation. Wait until the installation is complete.
Install JRE:
After installing JDK, run the command sudo apt install default-jre to install the default java runtime environment.

Installation of Oracle JDK:
The JDK can be downloaded by going to the Oracle website or from the terminal.
Steps for Downloading from the Website:
Click “Products” in the top navigation bar when the landing page has completely loaded.

Next, under the Hardware and Software section, select Java.

Click Download Java.

All the latest JDK files are available here. Since LTS (Long Term Support) versions receive stable upgrades for an extended duration, they should be used for development.
Now install JDK 21, which is the most recent version at this time.
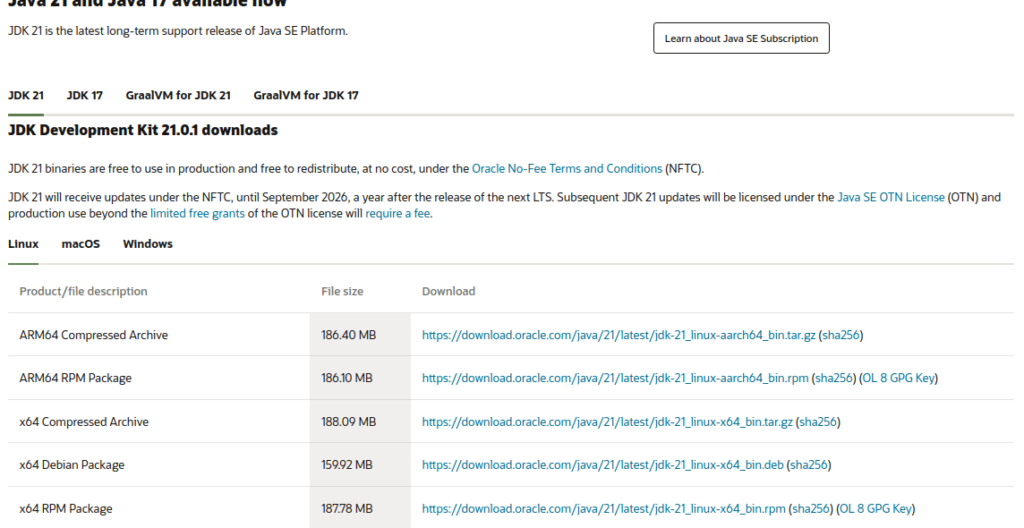
Select “Linux” in the operating system area to start the download, then click “Download the x64 Debian Package.” The Debian package file may be downloaded by simply clicking the download link.

A file that you download using Mozilla Firefox is stored in the Downloads folder. Navigate to the file’s location after selecting the terminal icon. As an alternative, you may immediately launch the terminal in that same spot by right-clicking on a folder and choosing “Open in Terminal” from the menu.
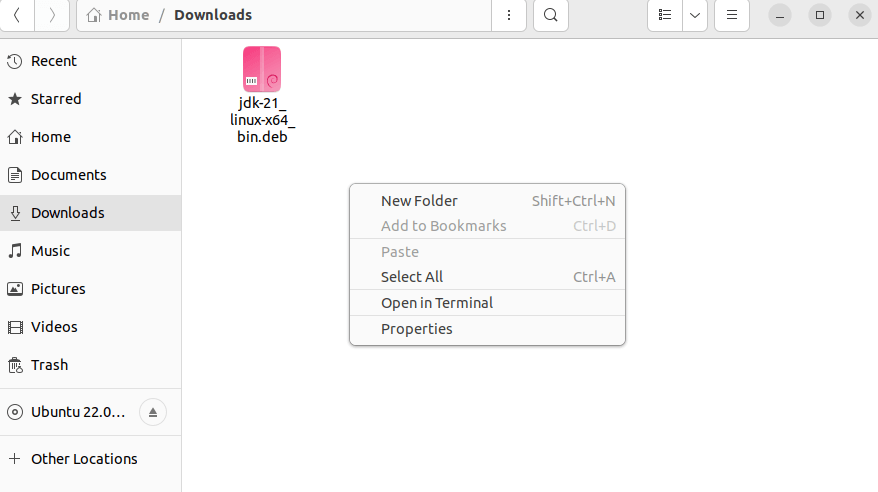
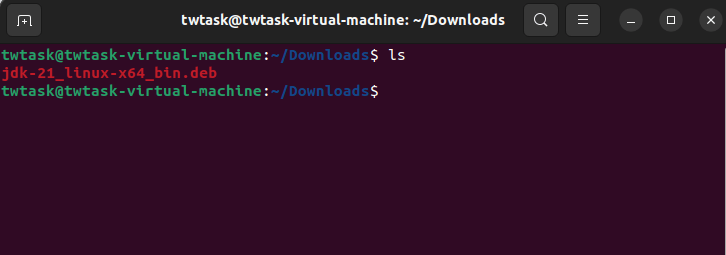
Use the ‘ls’ command to examine every file and folder in a given directory.
Discover the complete directory path containing the JDK package file. To reveal the entire path, use Ctrl + L. In my case, the directory path for the JDK Debian file is now /home/twtask/Downloads/, but yours might differ according to your download path. Be sure to copy this address.
Use the keyboard shortcut Ctrl + Alt + T to open the terminal to download JDK using the terminal. Although the GUI is an option, using the terminal to install the JDK is recommended. It is advised because of the terminal’s capacity to manage installation challenges.
Initiate the installation process with the command sudo apt install /home/twtask/Downloads/jdk_filename.deb.
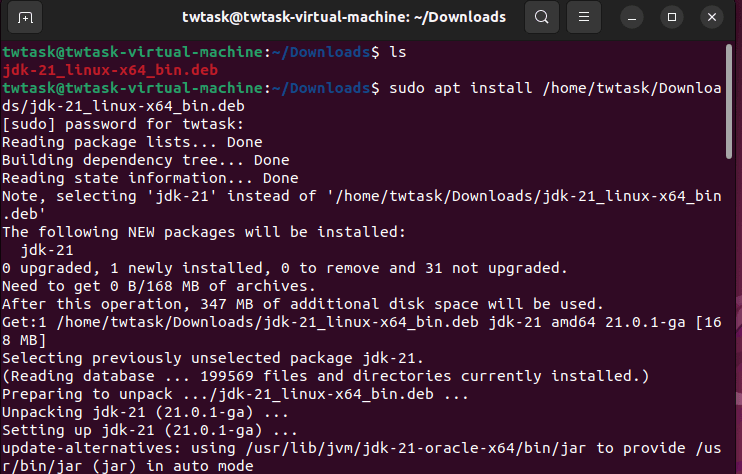
Before moving on to the following step, be sure the package has been installed successfully.
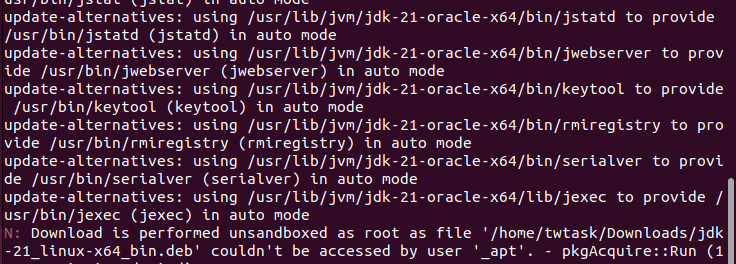
A Permission refused message may appear, stating that the file ‘/home/twtask/Downloads/jdk-20_linux-x64_bin.deb’ could not be read by the user ‘_apt.’ This might lead to N: Download being conducted unsandboxed as the root problem. You don’t need to worry, though, because we purposefully executed the installation in an “unsandboxed” manner.
Note: “unsandboxed” implies that certain safeguards are not there. Because unsandboxed processes could have more flexibility and might be able to access or change other system components, this could provide security problems.
Step by step Managing Java:
Java can be installed on multiple servers, and the update-alternatives command can set the default version for usage from the command line.

Press ENTER to save the current parameters or choose the number associated with the preferred Oracle Java version to make it the default version.
Additional Java commands, such as the Java compiler (javac), can execute multiple Java versions of programs in this way.

Establishing the JAVA_HOME Environment Variable:
Many Java programs utilize the JAVA_HOME environment variable to ascertain the location of the Java installation.
To configure this environment variable, identify the Java installation directory using the update-alternatives command.

Copy the path from your preferred installation. Ensure your copied path substitutes the underlined path at the end of the file, excluding the ‘bin/.’ Then, use Nano or another text editor to open the file /etc/environment.

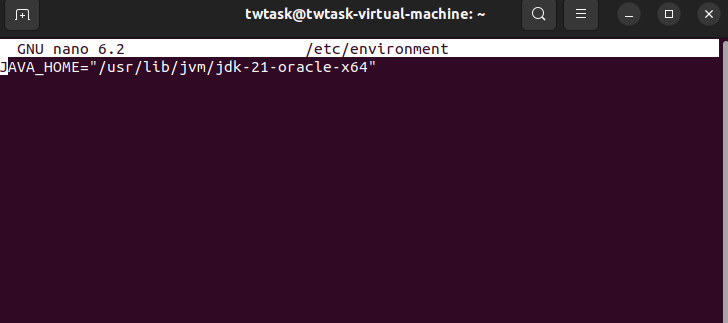
All users on your system will have their JAVA_HOME path defined if you modify this file.
To apply the changes to your current session, reload this file. You will see the path you just defined if the environment variable is correctly set.

To apply this setup, other users must perform the command source /etc/environment or log out and back in.
Advantages of Java on Ubuntu:
Java on Ubuntu offers several benefits, making it a preferred choice for both developers and consumers. First off, Ubuntu’s powerful package manager, APT, has made installing Java easier. Updates and downloads for Java are streamlined as default repositories often contain the latest OpenJDK versions.
Additionally, Ubuntu’s vibrant community ensures prompt assistance and provides troubleshooting tools for any Java-related issues. These adjustments maintain the overall structure while enhancing readability.
Developers may integrate Ubuntu with different Java frameworks and libraries more easily because of its interoperability with them. Ubuntu’s maintained environment guarantees an easy development process, whether you choose to use Hibernate, Spring, or other popular Java technologies.
Furthermore, Ubuntu is accessible to developers of all skill levels because of its user-friendly interface and documentation. The abundance of resources and simplicity of use provide a conducive atmosphere for development that encourages cooperation and production.
Conclusion
This article guides you through the process of installing Java on Ubuntu and explains how to modify the default version and set up the HOME environment variable.


