Learn how to locate and modify your Mac’s hosts file easily.

The Mac hosts file holds significant importance for various reasons, particularly when there is a need to override the Domain Name System (DNS) and assign a new IP (Internet Protocol) address. Understanding how to access and locate this file is fundamental in such scenarios.
Executing this task is relatively straightforward and expeditious. Users need to be acquainted with the necessary commands for managing the host database and the appropriate applications. With this knowledge, users can confidently update and edit the hosts file on their Macbook, enabling them to resolve domain names to specific IPs.
Jump To...
When a user is in the process of selecting an alternative device, server, or web server to establish an internet connection and encounters challenges with malicious websites, a concealed file on both Mac and Windows 10 systems comes into play. In this article, we will explore crucial aspects related to the hosts files on Mac and Windows 10.
This file serves as a vital component for the computer in performing DNS lookups and resolving IP addresses. Additionally, it has the capability to direct the computer to associate a specific address with a website, bypassing the typical DNS resolution conducted by name servers.
The Domain Name System
When a user inputs a domain name they wish to visit, several processes occur in the background. Every service, website, or device connected to the internet possesses a distinct numeric address known as an IP/TCP address, indicating its location. The DNS, or Domain Name System, plays a crucial role by translating these numeric addresses into human-readable formats. This system allows users to interact with websites and services using familiar domain names instead of having to remember and enter complex numerical IP addresses.
Your Mac device initiates a DNS lookup to a new server the first time a user enters a web address. This configuration is usually handled automatically by the Internet Service Provider (ISP). Subsequently, your Mac device establishes a private cache file to store and recall this information when the user revisits the same website.
Hosts File
The DNS, or Domain Name System, serves as the standard method for a Mac to determine how to reach destinations on the internet. Another useful approach involves editing the hosts file to override the default DNS information. Mac users can edit this file with any text editor, provided they have root user privileges.

How to locate the IP address of your website?
The Mac hosts file is frequently utilized to establish a connection between a website and the domain name indicated by DNS records, directing it to a different address. Users typically initiate this process by obtaining the website’s address.
Typically located in the system’s control panel, for SiteGround users, this address can be accessed through the website’s Site Tools > Dashboard > IP and Name Servers > Site IP.
To provide a more detailed explanation, let’s consider the example of a website created as my-new-website.com. This domain is nonexistent, unregistered, and lacks DNS records. When a visitor attempts to access this site, they will encounter the “This Site Can’t be Reached” error.

In this scenario, the IP address needs to be utilized in the hosts file to map “my-new-website.com” to the website. Users can preview this website on the local network by making adjustments to the Mac hosts file.
Similarly, users have the option to create a new website, assign a name to the site along with a domain name through DNS, and map the domain using the hosts file. This process allows for local previewing and testing of the website.
How to Modify the Hosts File in Windows 8, 10, and 11?
Editing the hosts file on various Windows systems follows a similar process. Simply open the file with Notepad. In Windows 7, it’s necessary to run Notepad as an administrator by providing the password, whereas, in older versions like XP, this step is not mandatory. Editing the hosts file is particularly useful for checking the content of a new site during the propagation period after connecting it to a domain for web hosting. Once propagation is complete, users should remove the added lines.
To expedite the procedure, users can flush the DNS cache by executing specific commands to clear a Mac’s DNS cache. However, regardless of the Windows version, the default Windows site remains similar unless the OS is installed in a different partition:
C:\Windows\System32\drivers\etc\hosts
Step 1 - Open Notepad
In this context, let’s proceed with editing on Windows 10. Click on the Start menu or open the Windows menu to initiate the process.

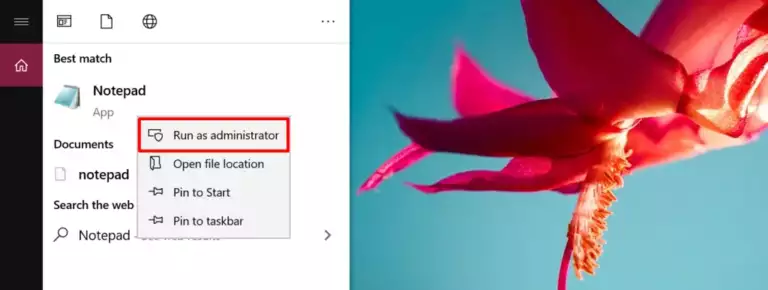
Type the “notepad” command into the search bar, and the search results will automatically display Notepad. Right-click on the Notepad icon and choose “Run as administrator” from the options provided. This step is crucial to ensure that you have the necessary permissions to edit the hosts file.
Step 2 - Open the Hosts File in Notepad
Click on the ‘File’ menu and then select ‘Terminal’, followed by clicking ‘Open’. This action will direct you to a file selector box.

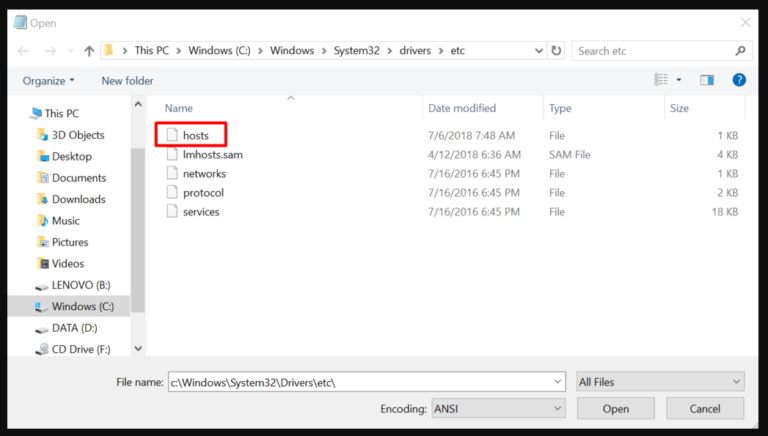
Ensure that you choose the ‘All Files’ option. Otherwise, the host’s File won’t appear in the dialogue box since it is a concealed file lacking a .txt extension. Opt for the ‘file’ option, and subsequently, click ‘open’.
Step 3 - Edit the Hosts File
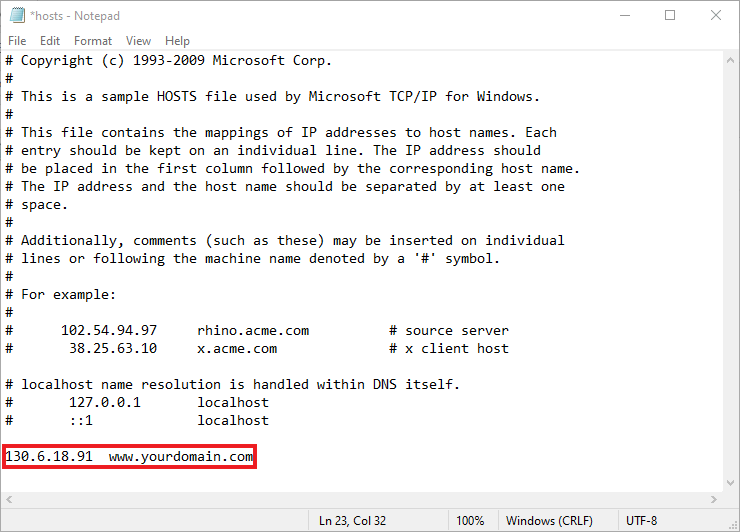
Windows 10 is similar to various other operating systems, containing a set of lines that specify the IP for the local network, hosts, and additional services. It’s important to observe that these lines are commented with the symbol ‘#’, indicating that they serve as examples and are not active.
To incorporate a custom hostname setting, users should append a new line at the end of the file, excluding the ‘#’ symbol.
The entry should adhere to the following format as outlined below:
IP_address yourdomain.com www.yourdomain.com
Replace ‘The IP with the actual IP of the website and the domain you are associating with the IP, such as “yourdomain.com”.
Suppose the user aims to link the non-existing domain “my-new-website.com” to the IP address 35.214.215.226. In this case, the line should be written as follows:
35.214.215.226 my-new-website.com www.my-new-website.com

How to modify the Hosts File on any macOS version?
A Macbook’s hosts file, although less emphasized, is a crucial text document capable of mapping hostnames to specified IP addresses. Despite the prevalence of private and public DNS servers on the modern Internet for IP address mapping, the hosts file offers a convenient means to override DNS servers. This allows users to manually redirect a website address to a chosen IP address or block access to a site entirely by redirecting it to a new or internal IP address within the Mac hosts file.
Step 1 - Launch Terminal on macOS
To edit the Mac’s hosts file, the user should utilize the Terminal application in its entirety. To open it, navigate to Finder > Go > Utilities.

Access the “Utilities” menu, providing users with tools for managing the Mac hosts file. Locate the Terminal application and double-click on the terminal icon.

Alternatively, users can open a terminal window using the Spotlight Search bar by pressing the shortcut key Command + Space. Then, type “terminal” in the pop-up window and press enter.

Step 2 - Access the macOS Hosts File in Terminal
To open the terminal window for the Mac’s hosts file and edit the file, you can use one of the available text editors.
Firstly, ensure that you are in the Mac’s top-level folder by typing the following command:
cd /
To execute the command, press Enter. This action will direct you to your Macintosh HD main folder.

The location on the local machine is:
/private/etc/hosts
Drag the Hosts file from the Finder window onto your desktop. Open the Hosts file using ‘TextEdit’ by default. Clear the existing content in the Hosts file and paste the following into the same file:
### Host Database##
When the system is in boot mode, the local host is utilized to configure the loopback interface#.
In this blog, we’ll be using the Nano text editor for editing. The user must have administrator privileges. The command line to open the file using the nano text editor is sudo nano etc. hosts, and it should be written as:
sudo nano /private/etc/hosts
After confirming the command by pressing Enter, the user needs to provide an administrator password. Enter the admin password and confirm it by pressing Enter.

Step 3 - Edit in Terminal
In this section, you can add your custom hostname settings. By default, the file may only include occasional lines explaining the broadcast host and local host address.
To add a new entry, use the arrow keys to navigate to the last line. Use the following command to point a domain to a new development server name.
IP_address yourdomain.com www.yourdomain.com
The user should replace the IP address with the website’s actual IP address, and ‘yourdomain.com’ should be substituted with the original domain name in the hosts file.
In this blog, we utilize the non-existing domain ‘my-new-website.com,’ which is not registered and lacks an active DNS cache.
The new website for “my-new-website.com” is hosted under the previously mentioned IP address.
To direct the system to open this website from the same domain name, the user should add the following line to the hosts file:
35.214.215.226 my-new-website.com www.my-new-website.com

When assessing Windows VPS hosting companies, prioritize performance and reliability. Scrutinize the hardware specifications provided by each hosting company, including the type of CPU, the inclusion of SSD storage for improved data retrieval speeds, the availability of an SQL server for smooth remote desktop access, and the amount of RAM offered on the web server. Investigate the VPS provider’s track record for uptime guarantees – a reliable VPS provider will have a demonstrated history of maintaining websites and applications operational with minimal downtime.

This command is followed by pressing Return to clear your Mac’s DNS cache, preventing any conflicts between DNS and the Hosts file. The changes should take effect immediately.
Test Modifications to the Hosts File
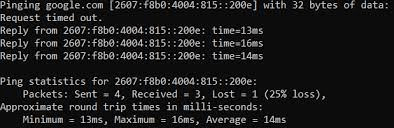
Once the user has added the hostname settings, testing the changes can be done using any browser. If the changes have the desired effect, the hostname should resolve from the specified IP address.
In the example used in this blog as a test site, an unregistered domain is employed. This is a nonexistent domain with no DNS zone. If the user opens the website and the changes haven’t taken effect, they may see ‘DNS_PROBE_FINISHED_NXDOMAIN,’ which is a common error message for an unregistered domain.

Nevertheless, the website will be accessible if the hostname is accurately directed to an IP address where a new website is installed.

After entering the details, click the ‘create’ button to generate a temporary URL. You will be prompted to agree to SkipDNS’s terms and conditions on the subsequent page. Subsequently, you will see a temporary URL generated by SkipDNS to access the hostname from the specified IP.
You can use this URL on any computer or browser to open the website, but keep in mind that this link will be valid for a limited period.
Methods to Preview the Website
To preview websites, editing the host files remains one of the most stable and reliable methods. While there are alternative approaches available for users who find editing the host file challenging, these alternatives come with specific strengths and weaknesses that may not be universally suitable for every case.

How to Create a Temporary URL Using SkipDNS?
Using a temporary URL is a popular method for previewing a website. Instead of modifying the host file, certain websites offer the capability to generate a temporary URL that can be accessed by any computer.

This approach is suitable for previewing an existing file or website. However, building or editing a website using a temporary URL is not recommended, as many website applications are domain-dependent, and the new content might not be accurately reflected through a temporary URL.
SkipDNS is one of the popular websites that can generate this type of URL.
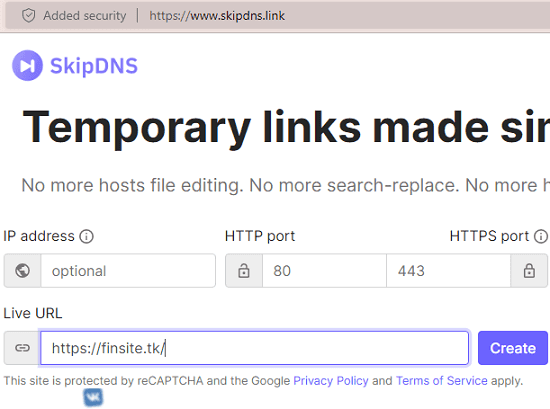
The user needs to enter the website’s IP address in the provided field and type the hostname in the Live URL field.
Methods to Modify Host Files in Windows 10

DNS, or Domain Name System, serves as the phonebook of the internet. However, the host file on the computer can also function as a guide for domain names.
Before getting started, it’s essential to have an IP address for your domain.
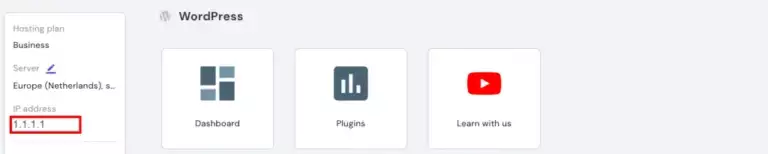
The first step is to log in to the panel on the left sidebar and check the hosting plan, server, and IP address details.
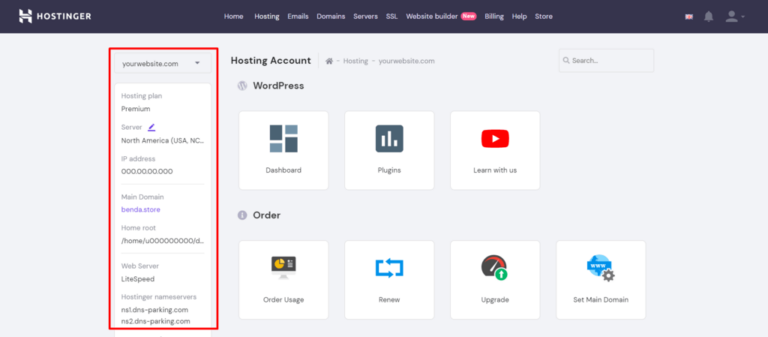
Copy the server’s IP address:
There are two methods for editing the host’s file on Windows 10:
1. Edit the file manually.
2. Use a host’s file editor tool.
Edit the File Manually
1. Select the Start button and open Notepad. Right-click and choose “Run as administrator.”
2. Open Notepad and navigate to File > Open. Then, go to C:\Windows\System32\Drivers\etc and select “All Files” to locate the host file.
3. There you go; you can now edit the host’s file. Enter the custom IP address you created before, separate it by a space, and then add your domain name.
4. Save the modifications once you have finished.
Utilizing a Hosts File Editor Tool
In Windows 10, a simpler way to edit the host’s file is by using the host’s file editor.
Enter your targeted IP address once you are in the Hosts File Editor, and type the domain name under their respective columns.
Save the changes you made when you are done.
In this article, you have learned how to edit the host’s file on different operating systems. Ensure that you have administrative rights before you start editing the host’s file. Keep in mind that it will only affect the computer that holds the host’s file.
As a user, you must use a text editor like Notepad to make changes in the host file or Nano text editor. On Mac, the user is required to edit the host’s file or Nano text editor through the terminal.
Frequently Asked Questions
The host file is a simple text document that associates domain names with IP addresses. Modifying the host’s file can be beneficial if you wish to restrict access to a particular website or redirect a domain name to an alternative IP address.
On Windows 10, the host file is situated at “C:\Windows\System32\drivers\etc\hosts”. You can access it using a text editor such as Notepad or Notepad++.
On macOS, the host file is found at “/private/etc/hosts”. You can open it using a text editor such as TextEdit or Sublime Text.
In most cases, you will require administrator/root privileges to edit the host’s file. On Windows 10, you can right-click the text editor and choose “Run as administrator”. On macOS, you can use the “sudo” command in the terminal to edit the host’s file as the root user.
To add an entry to the host’s file, open the host’s file in a text editor, insert a new line with the IP address and domain name, and save the file. For instance, to associate “example.com” with the IP address “192.168.0.1”, you would add the following line to the host’s file: “192.168.0.1 example.com“.
To remove an entry from the host’s file, delete the line corresponding to the domain name you want to eliminate and save the file.