Monitoring Linux VPS Resource Usage with Munin on CentOS 7.4 and Ubuntu 17.04
Overview
Monitoring your VPS is a crucial aspect of maintenance. While managing a single VPS might be manageable through quick SNMP requests or manual checks, handling a cluster of machines or simplifying monitoring for a single instance is more efficiently achieved using dedicated monitoring software.
Description
This guide will walk you through the installation and usage of the Munin[1] tool, which comprises two independent components: the Munin server installed on a designated machine for data collection and small Munin-node daemons installed on the servers being monitored.
A notable feature of Munin is its extensive plugin support, enhancing its versatility. Writing custom plugins is straightforward, as each plugin is essentially an executable file that gathers required information and provides it as output.
This guide will demonstrate how to install the munin-daemon on a Linux machine and set up an additional Linux VPS as a Munin server.
Requirements
- A CentOS 7.4 VPS server
- An Ubuntu 17.04 VPS server
- Basic knowledge of installing and configuring software on Linux
Master Configuration
1) Run the following command to install Munin on your Ubuntu 17.04 VPS. It will also pull other necessary packages:
2) Additionally, we need Apache and the FCGID module to display the information. Install them using the following command:
apt-get install apache2 libapache2-mod-fcgid
To enable the FCGID module in Apache on Ubuntu, you can use the a2enmod command. Here’s how you can do it:
a2enmod fcgid Encountering a message stating that the module is already enabled is normal. This message indicates that the FCGID module was previously enabled, and there’s no need for further action in this case.
3) To enable the Apache configuration for Munin, you need to create a symbolic link to the Munin Apache configuration file.
ln -s /etc/munin/apache24.conf /etc/apache2/conf-available/apache24.conf
ln -s /etc/apache2/conf-available/apache24.conf /etc/apache2/conf-enabled/munin.conf 4) Enable access to all hosts by editing /etc/munin/apache24.conf and replacing:
5) Replace the server name and IP address for your Munin master. Edit/etc/munin/munin.confand replace the existing entries with the appropriate information for your Munin master. Look for lines similar to:
[localhost.localdomain]
address 127.0.0.1
use_node_name yes
with your sample name, for example i have used my ip address as a name
[185.181.8.78]
address 127.0.0.1
use_node_name yes
6) Restart the Munin service and verify that the service is running correctly.
systemctl enable munin-node
systemctl start munin-node
systemctl status munin-node
Now you can access your Munin instance and view the monitored host. For example, my link will be http://185.181.8.78/munin/
Linux Client Setup
The client will be installed on CentOS 7.4, and there are two options available:
Installing Prepackaged CentOS Versions: Prepackaged versions can be easily installed by running the following command to check for available packages.
- Building and Installing the Latest Upstream Build[2]: While upstream packages are typically preferred, for simplicity and ease of maintenance, it is recommended to opt for the prepackaged CentOS version in this case. This avoids the manual building and installation process, making system maintenance and updates more straightforward.
1) Run the following command to install Munin Node on CentOS 7.4. Note that a variety of Perl packages will be pulled as dependencies, and this is expected:
2) Now, let’s configure the Munin Node. The main configuration file is located at /etc/munin/munin-node.conf.
Options are:
- host_name: This is the hostname that Munin Master will use to identify the agent. If you have a custom agent hostname on the master, you should change it accordingly.
- ignore_file: Specifies which plugins should be ignored.
- paranoia: This option is either set to true or false. When set to true, Munin allows plugins to run only if they are owned by the root user.
Other common options include:
- log_level: A numerical value from 0 to 4, where 0 means no logging and 4 means very verbose logging.
- log_file: The location of the log file.
- pid_file: The location of the PID file.
- background: Set to 1 to run Munin in the background.
- user: Specifies the user from which Munin is executed.
- group: Specifies the group from which Munin is executed.
- setsid: When set to 1, the daemon will fork itself, freeing it from the command line and running as a daemon.
- global_timeout: Specifies the time interval to drop the connection to the master.
- timeout: Sets the timeout for each single plugin to hold the connection.
- allow: Defines what hosts may connect to this Munin node.
- cidr_allow: Specifies allowed hosts in CIDR notation (e.g., 192.0.2.1/32).
- cidr_deny: Similar to cidr_allow, but denies hosts.
- host: The IP address on which the Munin node listens.
- port: The port on which the Munin node listens.
Here’s an example of a typical Munin Node configuration file:
#
# Example config-file for munin-node
#
log_level 4
log_file /var/log/munin-node/munin-node.log
pid_file /var/run/munin/munin-node.pid
background 1
setsid 1
user root
group root
# This is the timeout for the whole transaction.
# Units are in sec. Default is 15 min
#
# global_timeout 900
# This is the timeout for each plugin.
# Units are in sec. Default is 1 min
#
# timeout 60
# Regexps for files to ignore
ignore_file [\#~]$
ignore_file DEADJOE$
ignore_file \.bak$
ignore_file %$
ignore_file \.dpkg-(tmp|new|old|dist)$
ignore_file \.rpm(save|new)$
ignore_file \.pod$
# Set this if the client doesn't report the correct hostname when
# telnetting to localhost, port 4949
#
host_name localhost.localdomain
# A list of addresses that are allowed to connect. This must be a
# regular expression, since Net::Server does not understand CIDR-style
# network notation unless the perl module Net::CIDR is installed. You
# may repeat the allow line as many times as you'd like
allow ^127\.0\.0\.1$
allow ^::1$
# If you have installed the Net::CIDR perl module, you can use one or more
# cidr_allow and cidr_deny address/mask patterns. A connecting client must
# match any cidr_allow, and not match any cidr_deny. Note that a netmask
# *must* be provided, even if it's /32
#
# Example:
#
# cidr_allow 127.0.0.1/32
# cidr_allow 192.0.2.0/24
# cidr_deny 192.0.2.42/32
# Which address to bind to;
host *
# host 127.0.0.1
# And which port
port 4949
3) Let’s add our master node to the allowed list. Open /etc/munin/munin-node.conf and edit the configuration accordingly.
allow ^127\.0\.0\.1$
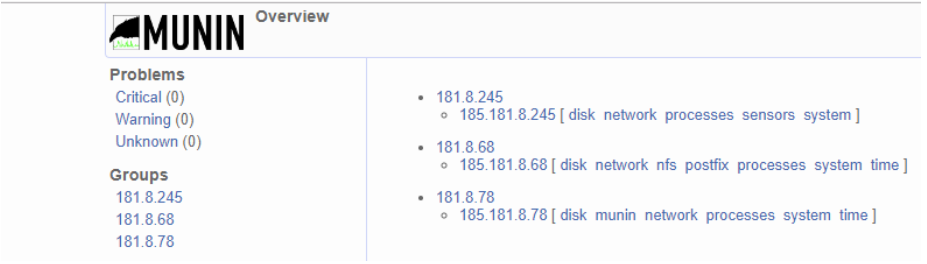
To reflect the IP address of your Munin master node, update the “allow” or “cidr_allow” option in the /etc/munin/munin-node.conf file. In my case, with the IP address 185.181.8.78, the string should look like:
allow ^185\.181\.8\.78$
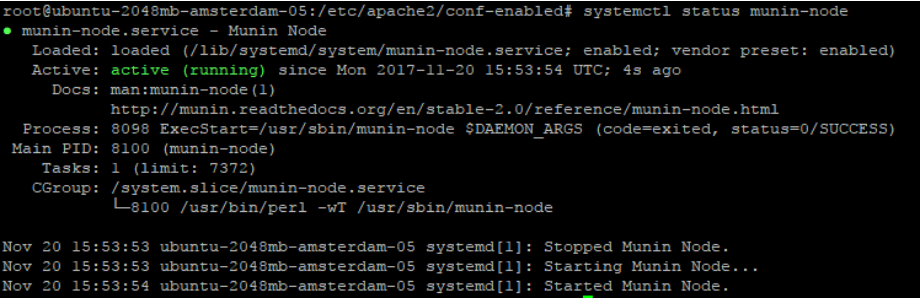
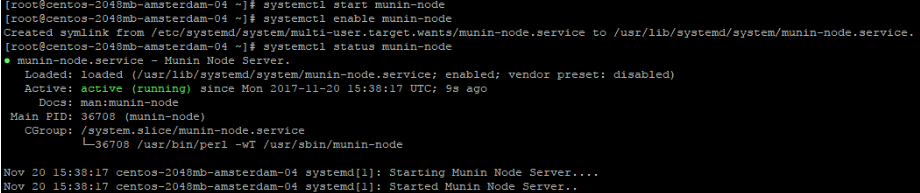
4) Now, initiate the Munin Node service, ensure it is set to start on boot, and verify its status to confirm smooth operation.
systemctl start munin-node
systemctl enable munin-node
systemctl status munin-node
Integrating Our Server with Munin Master for Monitoring
1) On the Munin Master (Ubuntu), open the configuration file for editing.
/etc/munin/munin.conf
find your host definition
[185.181.8.78]
address 127.0.0.1
use_node_name yes
Copy and paste the host definition for your Munin Node in the Munin Master configuration, and replace the placeholder data with the details specific to your monitored CentOS server.
[185.181.8.68]
address 185.181.8.68
use_node_name yes
Confirm that the configuration is available and restart Apache2 on the Munin Master.
cat /etc/munin/munin.conf |grep -A 2 -B 2 address
systemctl restart apache2
Munin may take some time to update itself, but once the process is complete, your monitored host will appear on the Munin Master web GUI!
In Summary
Now you know how to set up a powerful and useful monitoring application that can track the resources of your multiple VPS and physical servers. This makes the life of an administrator much easier and provides an easy way to visualize the timeline of system resource usage. If you have any more questions or if there’s anything else I can help you with, feel free to ask!
[1]: https://munin-monitoring.org/
[2]: https://munin-monitoring.org/download/
