You are here:

How to access your Mac mini Via Screen Sharing

What is Screen Sharing?

Screen sharing on a Mac is a built-in feature allowing you to remotely view or control another Mac over a network, ideal for remote support, collaboration, or accessing a home/office computer. It enables users to open files, launch apps, and manage files on the remote screen.

Step 1: Enable Permissions 

On the target Mac, navigate to System Settings > General. Scroll to bottom and ensure that Screen Sharing or Remote Management is toggled On.

Step 2: Launch the Application 

Open the Screen Sharing application. Ensure your Mac mini is active on the network.

Step 3: Identify the Target Device 

Click the (+) icon in the top toolbar to open the connection dialog.

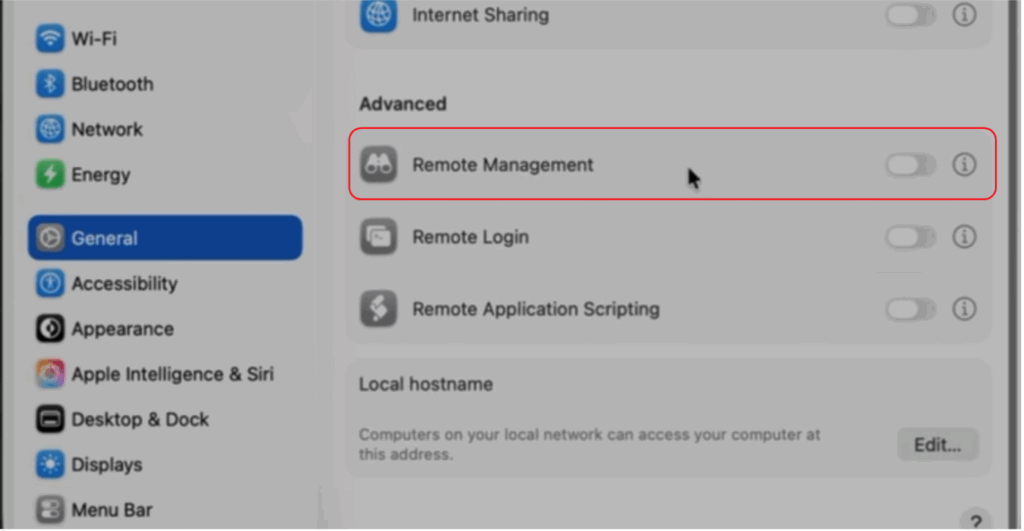
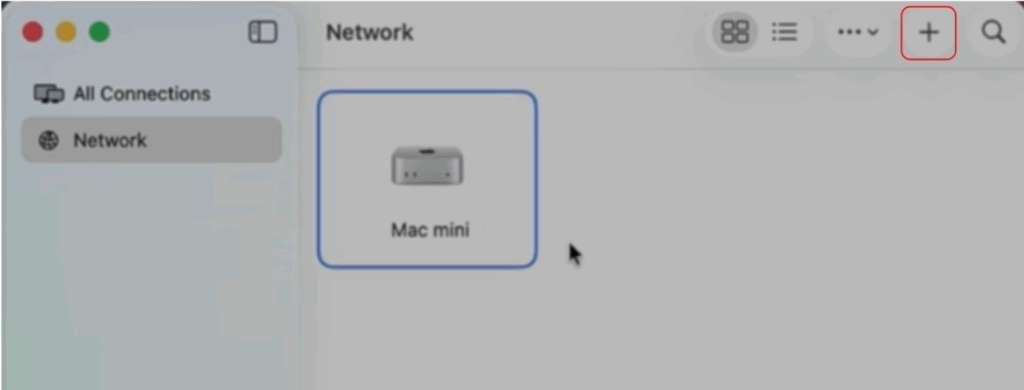
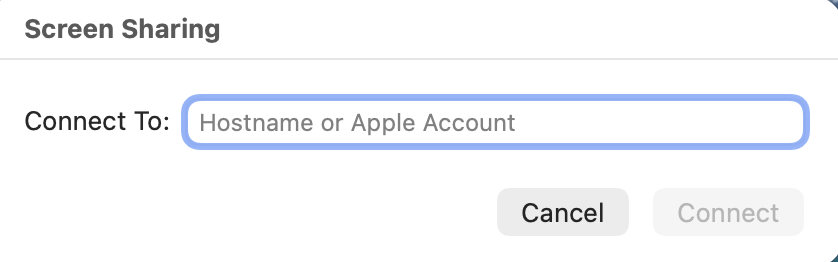
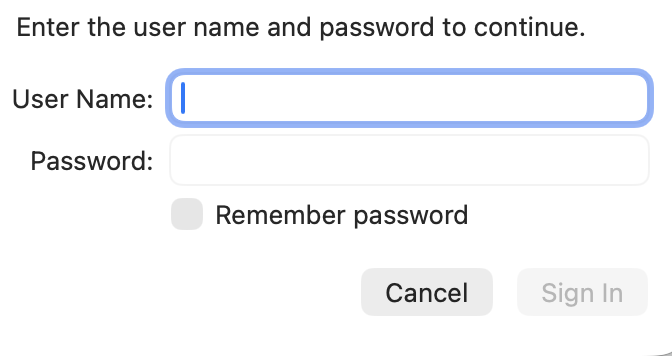
Step 4: Authenticate the Connection 

To establish a connection, input the Hostname of the destination Mac into the address field and click Connect. Once the prompt appears, enter the Username and Password exactly as provided and click Sign In, ensuring all details match perfectly to avoid a connection timeout.

Step 5: Initialize Session 

Once successfully, the remote desktop environment will initialize in a new window. You can now toggle between Control Mode (full interaction) and Observe Mode (viewing only) using the toolbar icons at the top of the window.

Was this article helpful?
Dislike 0