Installing an SSL Certificate on Vesta CP VPS Hosting: A Step-by-Step Guide

Securing your domain with an SSL certificate on Vesta Control Panel is a straightforward process, unlike the more complex setups on Apache or Nginx. If you’ve already set up Vesta CP, getting a certificate to work is a breeze.
Follow our step-by-step instructions to enhance the security of your domain. Let’s get started!
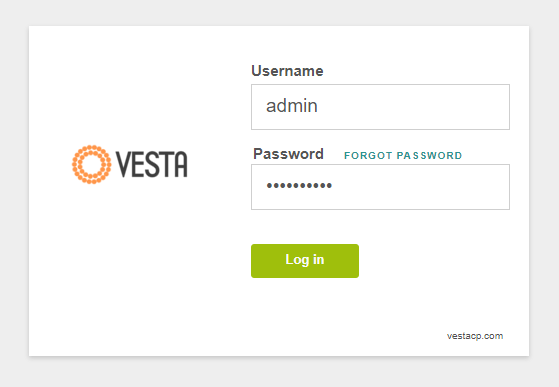
Step 1: Access your Vesta CP admin panel by logging in.
Simply navigate to https://yourdomain.com:8083, input your login details, and log in to your Vesta CP.
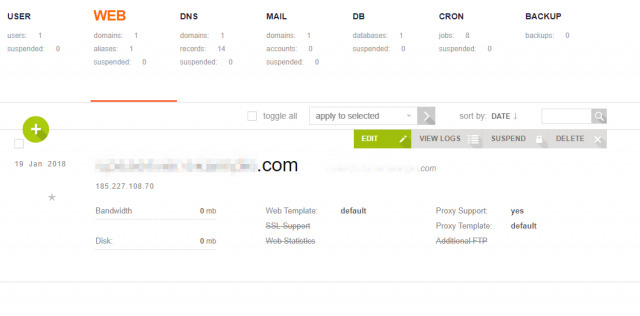
Step 2: Proceed to edit the domain settings.
Hover over your domain name, and select the “Edit” option to make necessary modifications.
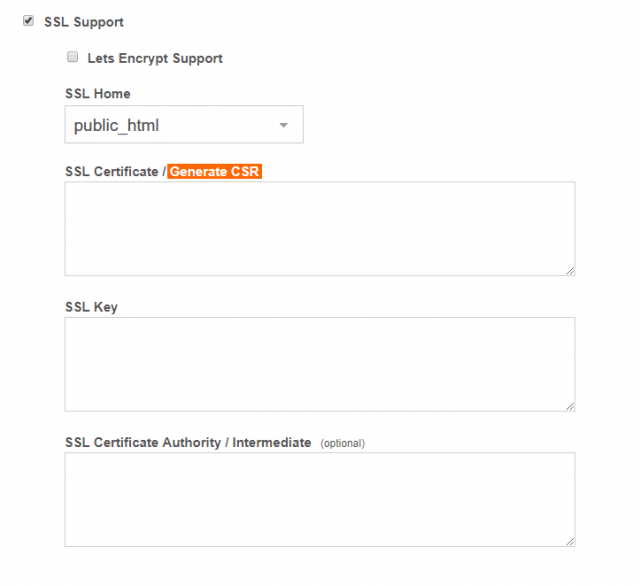
Step 3: Enable "SSL Support" and generate the CSR code.
Scroll down to the “SSL Support” section, toggle this option, and click on the “Generate CSR” button. The CSR, or Certificate Signing Request, is an unsigned certificate code. This code needs to be sent to your Certificate Authority to obtain a signed and issued SSL certificate.
Now, let’s take a closer look at this process.
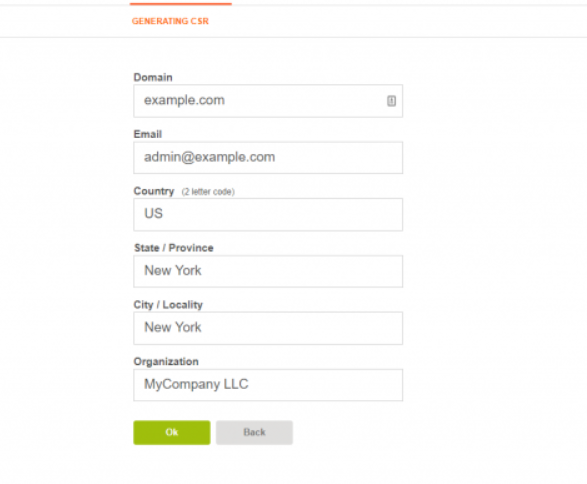
- Domain: Enter the domain name you want to secure with the certificate.
- Email: Input your email address; this information won’t be displayed in the certificate.
- Country, State, and City: Use your address; this information won’t be shown in the certificate.
- Organization: Use your organization name or your name if you don’t have an organization.
Click “OK” to generate the CSR.
On the next page, you’ll find three codes:
- SSL CSR: This is the code to be sent to your certificate provider/authority.
- SSL Certificate: A self-signed certificate (i.e., “not trusted”) generated automatically on the server. It’s not needed.
- SSL Key: Your private key code; keep it in a secure place (either on your server or local machine). Do not share it; it will be required for installing the certificate.
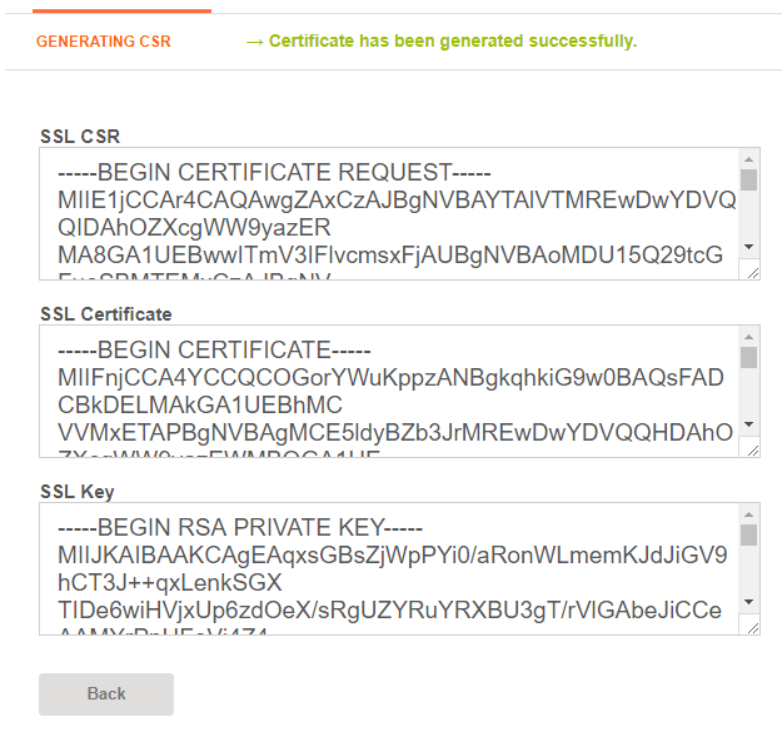
Feel free to return to the main page of Vesta CP. At this point, it’s crucial to send the generated CSR to your provider or certificate authority for validation. The validation process varies for different certificate types. Once validated, your certificate will be issued, and you’ll receive the certificate along with the Certificate Authority Bundle (chain) files from your certificate provider.
Step 4: Install the certificate on Vesta CP.
Once you’ve obtained all the necessary files, return to the domain editing page. Toggle the “SSL Support” option and input the codes into the corresponding boxes:
- Place your certificate code (enclosed with —–BEGIN CERTIFICATE—– and —–END CERTIFICATE—– headers) into the SSL Certificate box.
- Insert your private key code (with —–BEGIN RSA PRIVATE KEY—– and —–END RSA PRIVATE KEY—– headers) into the SSL Key box.
- Place the CA Bundle code (with —–BEGIN CERTIFICATE—– and —–END CERTIFICATE—– headers) into the SSL Certificate Authority / Intermediate box. This usually contains multiple certificates in one file. While optional, we recommend using the CA Bundle to avoid non-trusted error messages in browsers.
Click on the Save button to apply the settings.
Congratulations! Your certificate is now installed and functioning correctly. You can access your website securely via https://yourdomain.com.
That’s all. Keep it secure!