How to Use Rsync to Synchronise Files and Directories
Overview
Rsync is a versatile open-source utility designed for seamless file transfer and synchronization between hosts. Notably, it serves dual roles as both a server and client. One of its primary applications is automating data backups from a server to a designated backup server, showcasing its robust capabilities in managing file synchronization tasks.
The benefits of rsync usage:
Save Bandwidth and Supports Resume
Flexibel
Fast
Easy Setup
Several Fundamental Rsync Command Options:
| Options | Function |
|---|---|
| -v, –verbose | increase verbosity |
| -a, –archive | archive mode |
| -r, –recursive | recurse into directories |
| -u, –update | skip files that are newer on the receiver |
| -e, –rsh=COMMAND | specify the remote shell to use |
| -z, –compress | compress file data during the transfer |
| -h, –human-readable | output numbers in a human-readable format |
Requirements
Prerequisites for the Tutorial:
- Ensure you have two hosts set up in your local environment or utilize blendhosting.com[1].
For this tutorial, we will be using blendhosting.com[2] to create two hosts, both running the Ubuntu operating system. However, you can adapt these instructions for other distributions like CentOS, Fedora, Debian, etc.
Rsync Installation Guide
Installing Rsync is as simple as typing the command:
for Debian / Ubuntu
root@host-ubuntu:~# apt-get install rsync
for Fedora / CentOS / Scientific
root@host-centos:~# yum install rsync
That’s it! Rsync is now installed on your server.
File and Directory Synchronisation on the Local Server
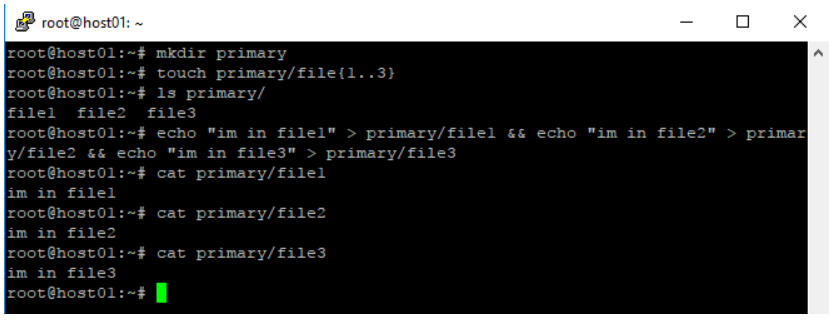
To create the “primary” folder and files (file1, file2, file3) in the terminal, you can use the following commands:
root@host01:~# mkdir primary
root@host01:~# touch primary/file{1..3}
To check the created folder and files and then fill the files with text, you can use the following commands:
root@host01:~# ls primary/
root@host01:~# echo "im in file1" > primary/file1 && echo "im in file2" > primary/file2 && echo "im in file3" > primary/file3
root@host01:~# cat primary/file1
root@host01:~# cat primary/file2
root@host01:~# cat primary/file3
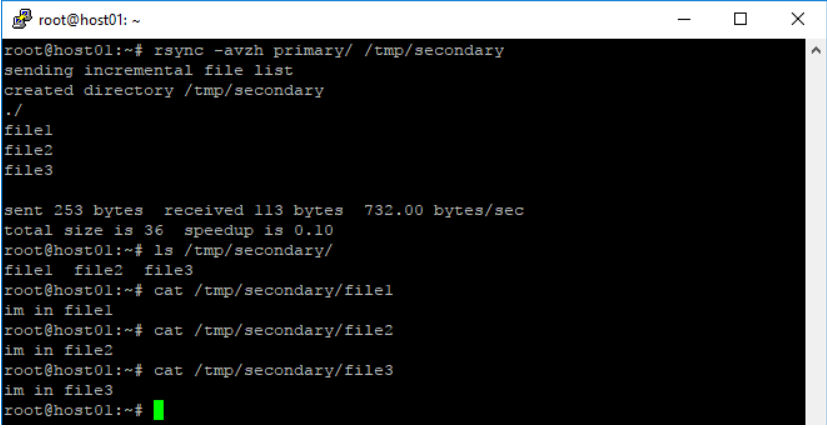
To sync the “primary” folder from /root/primary/ to /tmp/secondary/ using rsync, you can use the following command:
root@host01:~# rsync -avzh primary/ /tmp/secondary
To check the synchronized files in the “/tmp/secondary/” directory, you can use the following commands:
root@host01:~# ls /tmp/secondary/ root@host01:~# cat /tmp/secondary/file1 root@host01:~# cat /tmp/secondary/file2 root@host01:~# cat /tmp/secondary/file3
john@locahost:~$ sudo apt-get install nodejs nodejs-legacy Reading package list… Done Building dependency tree Reading state information… Done
Synchronize Files and Directories from Local to Remote Server Using rsync
To sync the “primary” folder from host01 to the “secondary” folder on host02, you can use rsync along with SSH. Here’s an example command:
root@host01:~# rsync -avz primary/ root@185.144.157.99:/tmp/secondary/
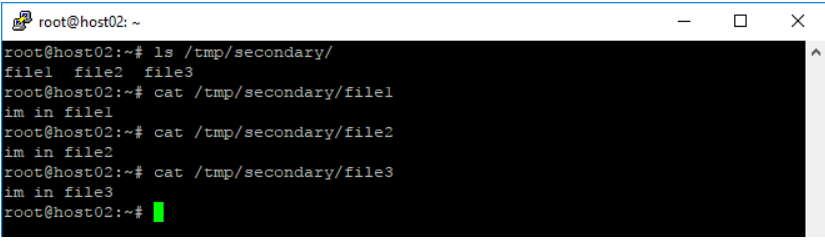
To check the synchronized files on host02, you can use the following commands:
root@host02:~# ls /tmp/secondary/
root@host02:~# cat /tmp/secondary/file1
root@host02:~# cat /tmp/secondary/file2
root@host02:~# cat /tmp/secondary/file3
Synchronize Files and Directories from a Remote Server to a Local Server Using rsync over SSH
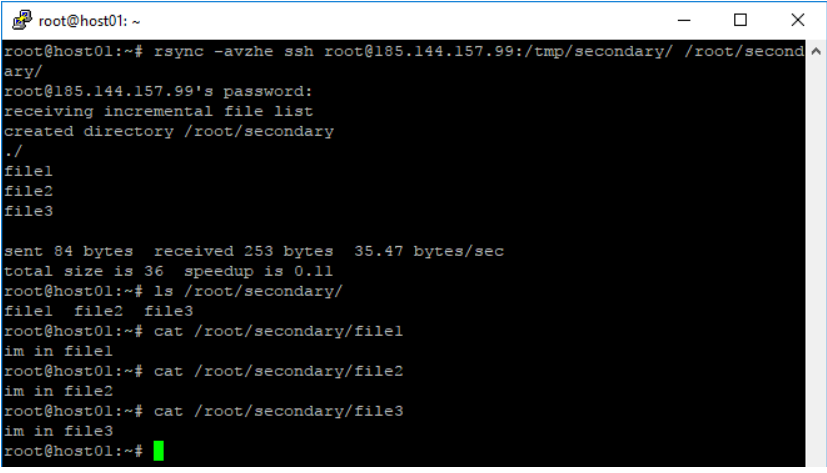
To sync the “secondary” folder from host02 to the “primary” folder on host01, you can use a similar rsync command. Here’s an example:
root@host01:~# rsync -avzhe ssh root@185.144.157.99:/tmp/secondary/ /root/secondary/
To check the synchronized files in the “primary” folder on host01 after syncing from host02, you can use the following commands:
root@host01:~# ls /root/secondary/
root@host01:~# cat /root/secondary/file1
root@host01:~# cat /root/secondary/file2
root@host01:~# cat /root/secondary/file3
Synchronize Files and Directories from a Local Server to a Remote Server Using rsync over SSH
To sync the “primary” folder from host01 to the “secondary” folder on host02 using SSH, you can use the following rsync command:
root@host01:~# rsync -avzhe ssh primary/ root@185.144.157.99:/home/secondary
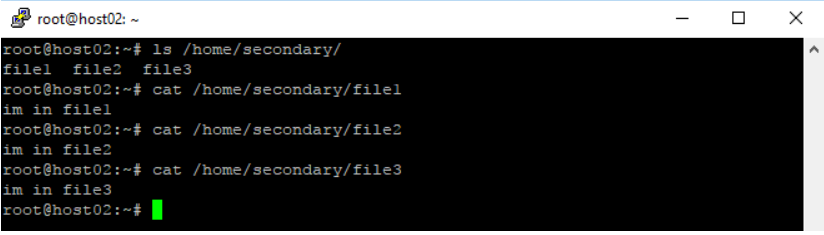
To check the synchronized files in the “secondary” folder on host02 after syncing from host01 via SSH, you can use the following commands:
root@host02:~# ls /home/secondary/
root@host02:~# cat /home/secondary/file1
root@host02:~# cat /home/secondary/file2
root@host02:~# cat /home/secondary/file3
Display Status While Files and Directories Are Synchronised
If you want to show progress while synchronizing files/directories from host01 to host02 using rsync, you can add the –progress option. The modified command would look like this:
root@host01:~# rsync -avzhe ssh --progress primary/ root@185.144.157.99:/root/secondary
Limit the Bandwidth
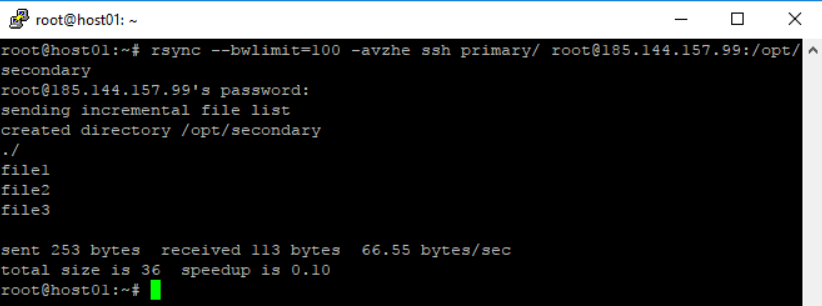
If you want to limit the bandwidth usage during the synchronization process, you can use the –bwlimit parameter.
root@host01:~# rsync --bwlimit=100 -avzhe ssh primary/ root@185.144.157.99:/opt/secondary
That’s it for the installation and basic operations of Rsync. I trust this tutorial has provided a clear understanding of Rsync. If you come across any bugs or find errors in the documentation, please leave your comments below. Your feedback is valuable!

[1]: https://www.blendhosting.com/
[2]: https://www.blendhosting.com/